Publishing a Release
This guide covers how to publish an official biannual UN/LOCODE release. The process uses a release-first approach — the Secretariat creates the release with all accompanying documentation in a single step, and the automated pipeline handles the rest.
Prerequisites
Before creating a release, ensure that:
- All locode changes for the release period have been merged to the
mainbranch - The Secretariat Notes document (
.doc) is prepared and ready to upload
Steps
1. Create the Release on GitLab
Navigate to the Releases page on GitLab and fill in the following:
Tag name
: Use the format YYYY-N where YYYY is the year and N is the release period (1 for January, 2 for July). For example: 2025-1.
Create from
: Select the main branch. Ensure the branch contains all the locode data intended for this release.
Release title
: Use the format: UN/LOCODE (CODE FOR TRADE AND TRANSPORT LOCATIONS) Issue YYYY-N
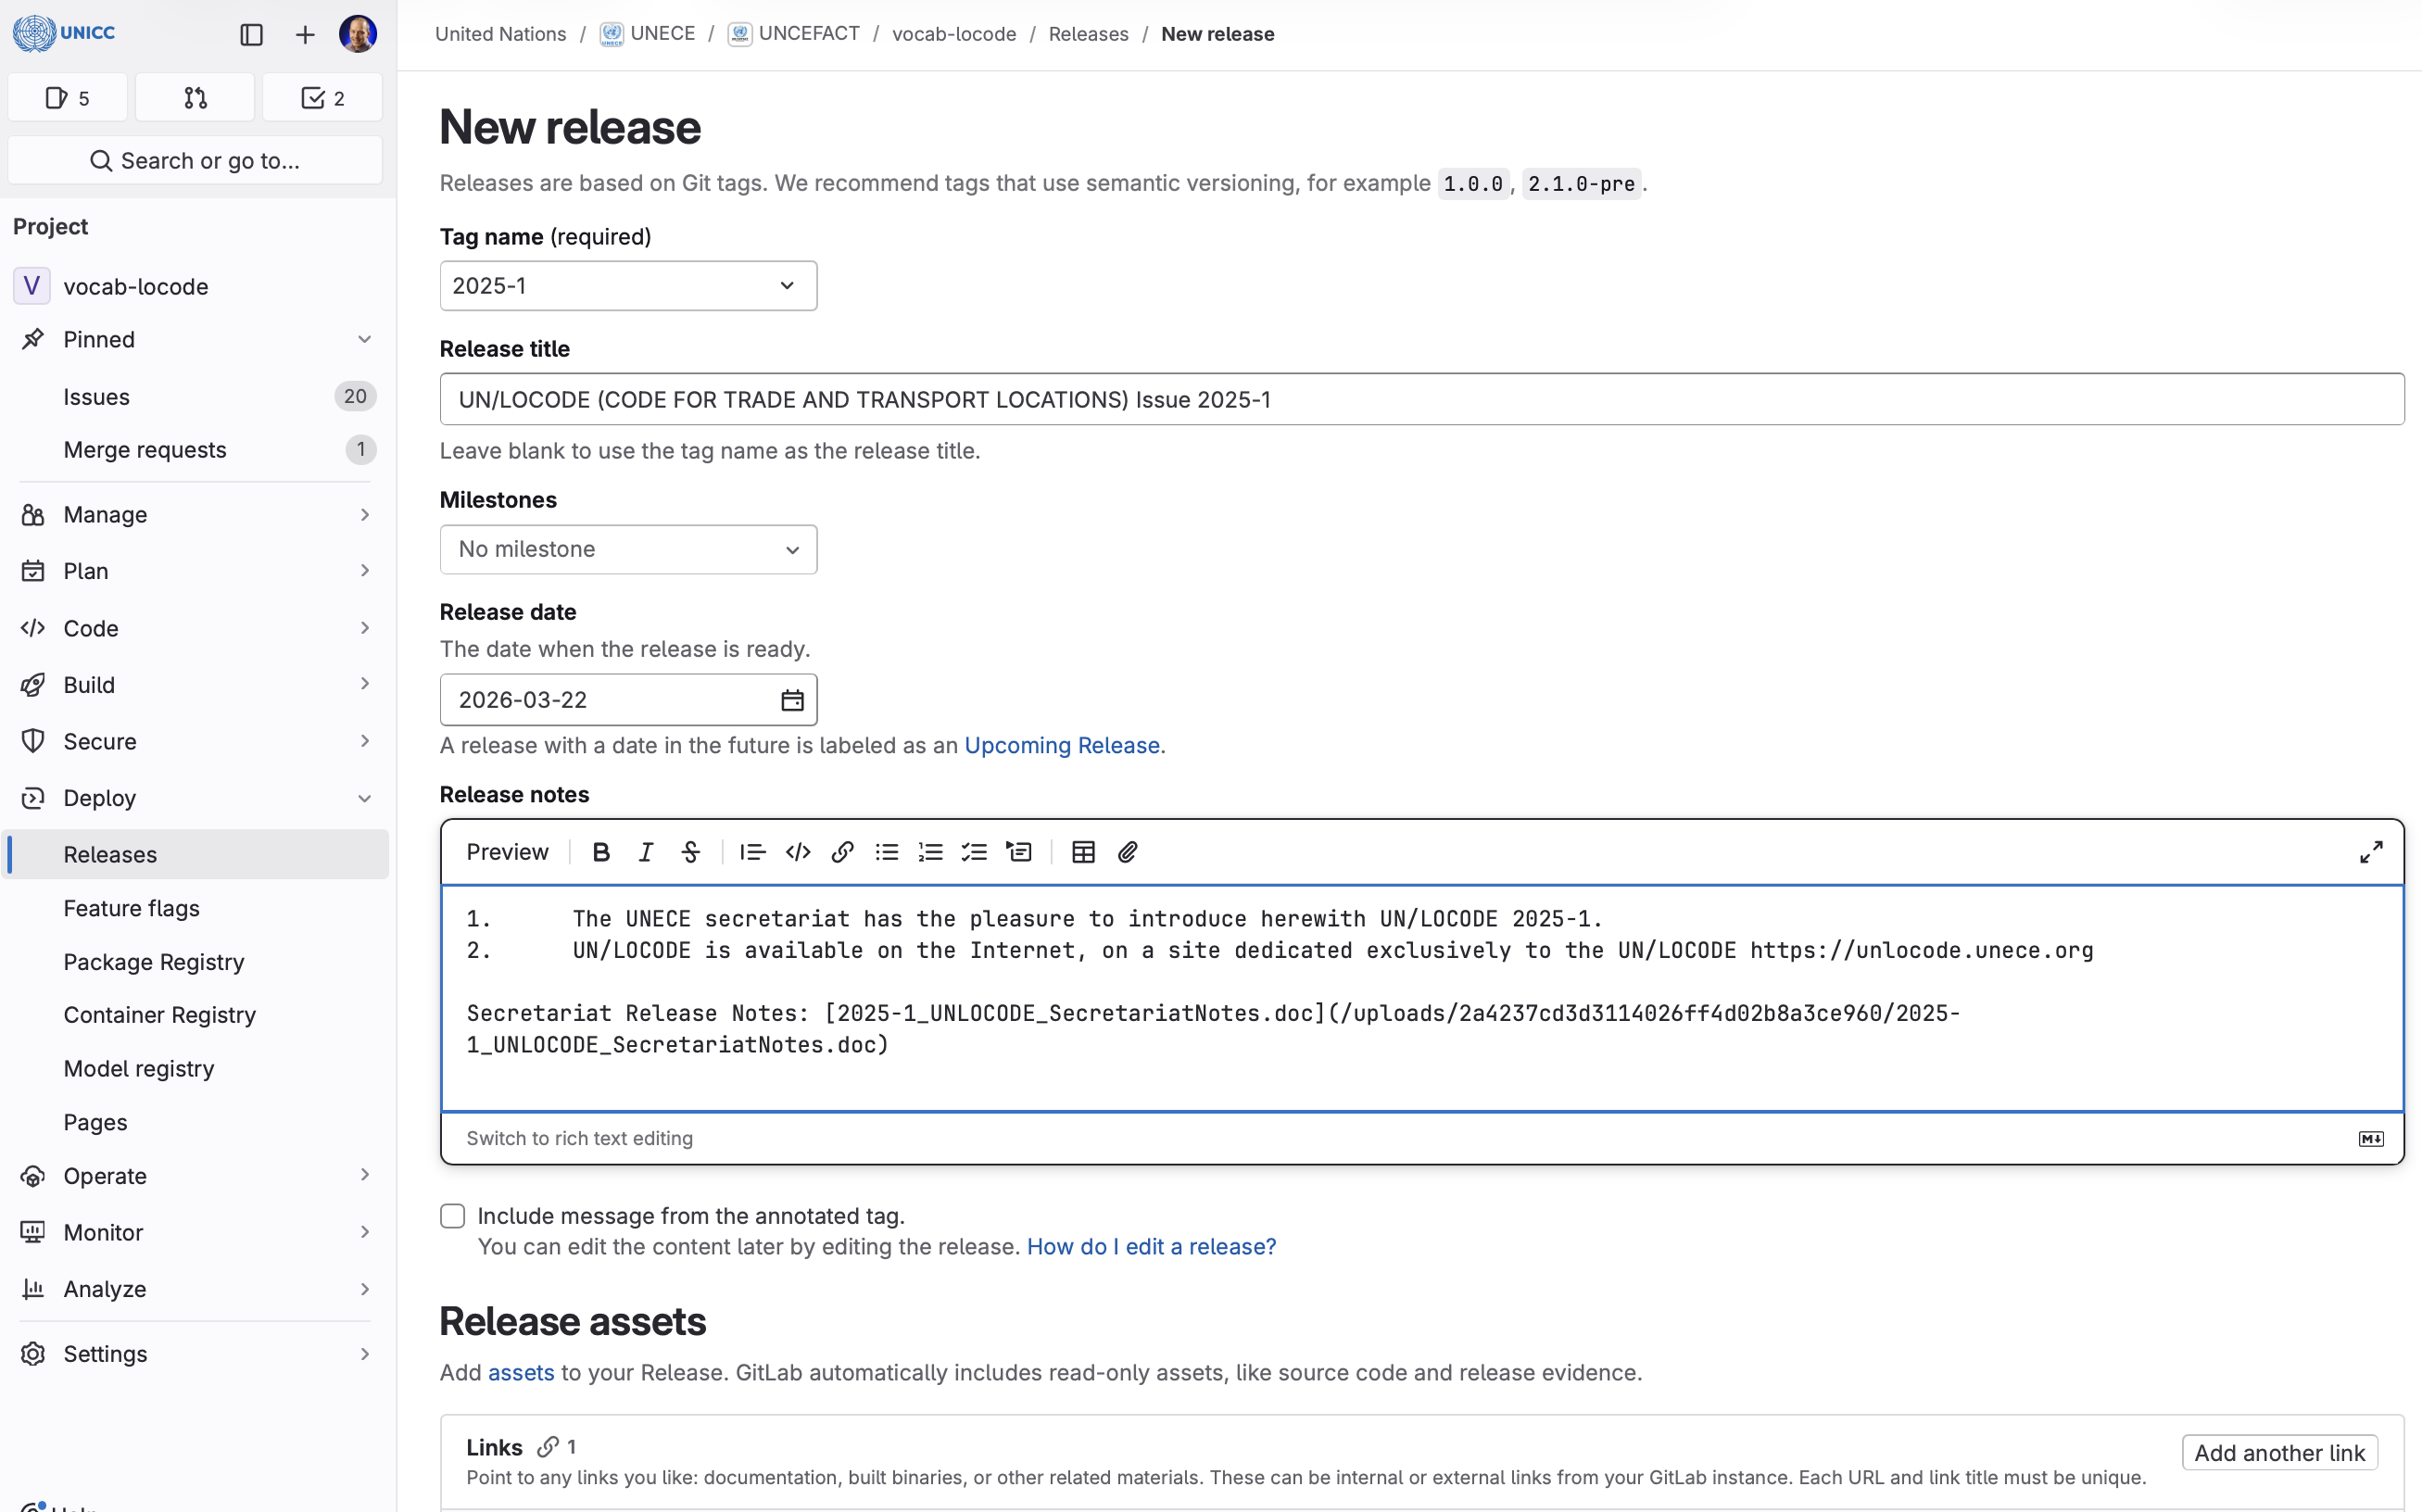
Release description : Include the introductory text and a link to the Secretariat Notes. Upload the Secretariat Notes document using the attachment button in the description editor, which will generate a markdown link automatically.
Example description:
1. The UNECE secretariat has the pleasure to introduce herewith UN/LOCODE YYYY-N.
2. UN/LOCODE is available on the Internet, on a site dedicated exclusively
   to the UN/LOCODE https://unlocode.unece.org

Secretariat Release Notes: [YYYY-N_UNLOCODE_SecretariatNotes.doc](/uploads/...)
The page should look something like this:
2. Publish the Release
Click Create release. This will:
- Create a new Git tag (
YYYY-N) pointing at the currentmainbranch - Create the GitLab release with the Secretariat Notes attached
3. Automated Pipeline
Creating the tag automatically triggers the CI/CD pipeline, which will:
- Reconcile change indicators and prune aged X rows (tag releases only) — Three source-side steps run in sequence and are committed back to
mainas a single bot commit so the source tree stays in sync with what was published:- Fetch previous release — Download the previous tag's
package-releaseartifact from GitLab job storage (CI uses the auto-providedCI_JOB_TOKEN; no extra secret needed). The artifact is unzipped to a temp directory and used as the comparison baseline. If the previous artifact has expired (default retention is 1 year), the apply-change-indicators step is skipped with a warning. - Apply change indicators — Compare each row in
locodes/against the previous published release. Set+on new entries,#on name-only changes,|on other content changes, and clear stale indicators on rows that have not actually changed since the last release. Stamp the YYMM date column to the current edition's YYMM for any row that received a fresh indicator with an empty or older date. - Prune aged X rows — Physically remove any entry marked with
Xwhose date column is at least 12 months older than the current edition. Per UN/LOCODE Manual § 7.1.1, X-marked entries serve as a deletion notice and are retained for one calendar year before being removed.
- Fetch previous release — Download the previous tag's
- Publish — Generate publication files (CSV, TXT, XML, MDB) from the locode source data. All change indicators (
+,#,|,=,!,X) are emitted verbatim so consumers see what changed since the previous edition. X rows still inside the 12-month notice window appear with theirXindicator visible. - Package — Bundle all publication files into a downloadable archive
- Release — Add the Data Archive download link to the existing release
- Build Website — Rebuild the website, picking up the new release version and release notes for the Publications page
- Deploy — Deploy the updated website
No further action is required from the Secretariat. The pipeline typically completes within a few minutes.
CI prerequisite: CI_PUSH_TOKEN
The prune step in stage 1 commits back to main. This requires a GitLab project access token with write_repository scope, stored as a masked CI variable named CI_PUSH_TOKEN. To create or rotate the token:
- Go to Settings → Access Tokens on the project.
- Create a token named
release-botwith theMaintainerrole andwrite_repositoryscope. - Copy the token value.
- Go to Settings → CI/CD → Variables, add a variable named
CI_PUSH_TOKEN, paste the token, mark it Masked and Protected.
Without this token configured, the prune step will fail to push and the release will not complete.
4. Verify
Once the pipeline completes, verify that:
- The Publications page shows the new release version with the release notes displayed below the download button
- The release on GitLab has the UNLOCODE Data Archive asset link attached
- The data archive downloads correctly
Release Naming Convention
| Period | Tag | Display Date |
|---|---|---|
| First half (January) | YYYY-1 | January YYYY |
| Second half (July) | YYYY-2 | July YYYY |
Troubleshooting
Pipeline fails on the release job
If the release was created before the pipeline ran (which is the expected flow), the pipeline will detect the existing release and add the asset link. If the asset link already exists, the job will continue without error.
Release notes not appearing on the website
The website displays the full release description from GitLab as release notes on the Publications page. Ensure the release has a description with the introductory text and Secretariat Notes link. Any file upload links (e.g., /uploads/...) are automatically resolved to absolute URLs.